
How to Patch Drywall Holes Without a Trace
A small hole in a wall can make an otherwise clean room look neglected, especially after furniture is moved, shelves come down, or a rental turns over. Knowing how to patch drywall holes helps you protect your home’s appearance and avoid a repair that shows through fresh paint. The key is not simply filling the opening. A lasting repair needs the right patch, a stable surface, and enough time for each coat to dry.
Start by Matching the Repair to the Hole
Drywall damage is not one-size-fits-all. A nail hole left by wall art needs a different approach than a doorknob-sized impact or a section that has softened from a plumbing leak. Choosing the right method at the beginning saves time, reduces sanding, and creates a smoother finish.
For small nail holes, screw holes, and shallow dents, lightweight spackling compound is usually enough. It applies easily, dries quickly, and works well for cosmetic touch-ups. For holes around 1 to 3 inches wide, a self-adhesive mesh patch covered with joint compound is often the practical choice.
Larger holes need more structure. If the opening is wider than about 4 inches, or if the drywall around it is cracked and loose, install a new piece of drywall supported by backing. This takes more preparation, but it prevents the patch from flexing or sinking later.
Before beginning, make sure the wall is dry. In Central Florida, a stain, soft drywall, peeling paint, or recurring crack may point to moisture from a pipe, AC condensation line, roof leak, or humidity issue. Repairing the surface without finding the source can lead to the same damage again.
Tools and Materials for Patching Drywall Holes
Most small repairs can be completed with a putty knife, sanding sponge, spackling or joint compound, primer, and matching wall paint. For a larger repair, add a drywall saw, utility knife, drywall screws, a scrap piece of drywall, wood backing strips, joint tape, and a wider taping knife.
Use a clean, flexible putty knife for small patches. A 6-inch or 10-inch taping knife makes it easier to feather compound over larger areas. The wider the final coat extends beyond the repair, the less likely you are to see a raised edge after painting.
Keep dust control in mind. Drywall sanding creates fine powder that can spread through nearby rooms. Protect flooring and furniture with drop cloths, wear a dust mask and safety glasses, and use a damp cloth or vacuum to clean the area when finished.
How to Patch Drywall Holes Smaller Than an Inch
Small holes may look simple, but overfilling them is a common mistake. A thick mound of spackle takes longer to dry and creates extra sanding work.
First, remove loose paper and gently scrape away any raised edges around the hole. Press a small amount of spackle into the opening with a putty knife, then draw the knife across the wall to leave the surface nearly flat. The goal is to fill the void, not build up material on the wall.
Let the patch dry according to the product instructions. If it shrinks slightly, apply a second thin coat. Once dry, sand lightly with a fine-grit sanding sponge until the surface feels smooth when you run your hand across it. Wipe away dust, apply primer if needed, and paint.
For nail pops, do not just cover the raised nail head. Drive a drywall screw into the stud just above or below the popped nail to secure the drywall, then set the nail slightly below the surface. Cover both spots with compound. This provides a more dependable repair than cosmetic filler alone.
A Note About Paint Matching
Even a perfectly patched wall can stand out if the paint does not blend. Paint colors change with age, sunlight, cleaning, and room lighting. If you have leftover paint from the original project, stir it thoroughly and test it in an inconspicuous spot.
When no matching paint is available, take a small sample from behind an outlet cover or another hidden location to a paint store. In many cases, painting from corner to corner on the repaired wall gives a more uniform result than touching up one small area.
Repairing Medium Holes With a Mesh Patch
A mesh patch is a reliable option for holes left by a removed wall anchor, a misplaced door handle, or minor impact damage. Start by trimming loose drywall paper and jagged material away from the edges. The surface should be firm, clean, and relatively flat.
Center the self-adhesive patch over the hole and press it firmly into place. Using a taping knife, spread joint compound across the patch and extend the first coat a few inches beyond its edges. Press firmly enough to work compound through the mesh, but do not leave a heavy ridge.
Allow the first coat to dry completely. Then apply a second, wider coat with the edges feathered thinly into the surrounding wall. A third finish coat may be needed for a truly smooth result, particularly on walls with a satin or semi-gloss sheen that reveals imperfections.
Sand between coats only as needed. Aggressive sanding can expose the mesh, create dips, or damage the drywall paper around the patch. A light touch and several thin coats generally produce better results than one thick application.
Patching a Large Drywall Hole With New Drywall
For a large opening, square up the damaged area first. Use a drywall saw or utility knife to cut a clean rectangle around the hole, removing cracked or weakened material. Straight edges make it easier to fit the replacement piece and tape the seams.
Slide wood backing strips behind the existing drywall on both sides of the opening. Secure the strips with drywall screws driven through the surrounding wall. Cut a new drywall piece to fit the opening, position it against the backing, and fasten it with screws. Set screw heads slightly below the surface without tearing the paper face.
Apply joint tape over every seam. Paper tape produces a clean finish when installed with a thin bed of joint compound, while mesh tape is convenient for many repairs. Cover the tape and screw heads with compound, then feather the edges well beyond the seams.
After the first coat dries, apply two additional thin coats, making each one wider than the previous coat. This gradual transition is what makes the repaired section blend with the original wall. Sand lightly after the final coat, then check the patch with a work light held at an angle. Side lighting reveals ridges and shallow spots that normal room lighting can hide.
When a Drywall Patch Needs Professional Attention
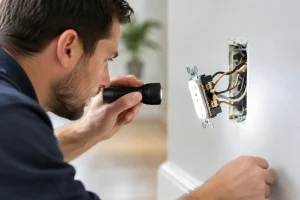
Some wall damage calls for more than a patch kit. A hole near an outlet, switch, plumbing line, or HVAC equipment can involve safety concerns. Do not cut into a wall until you understand what may be behind it, and turn off power at the breaker before working near electrical boxes.
Repeated cracks, soft drywall, broad water stains, mold-like discoloration, or a wall that feels loose may signal a larger maintenance problem. In rental homes and commercial spaces, prompt repair also helps prevent small damage from becoming a tenant complaint, inspection issue, or more expensive restoration project.
Davenport Handyman Services can inspect the damage, identify the right repair scope, and provide polished drywall finishing when a project needs more than a quick cosmetic fix. Professional help is especially worthwhile when the patch must match textured walls, high ceilings, or a freshly painted room.
Give the Finish the Time It Deserves
The final difference between an obvious patch and a wall that looks untouched is patience. Let compound dry fully, use thin layers, feather every edge, and prime before paint when the repaired area is larger or more porous than the surrounding wall. A careful repair brings the room back together and leaves you with a clean surface ready for whatever comes next.