How to Replace Door Weatherstripping Correctly
A front door that rattles in the frame, lets in humid Florida air, or leaves a dusty line along the threshold is not just an annoyance. Small gaps can make rooms feel less comfortable, invite insects inside, and force your AC system to work harder. Learning how to replace door weatherstripping is a manageable maintenance project when the door itself is in good condition and the correct seal is selected.
The goal is not simply to add the thickest material available. A good weather seal closes the gaps without making the door difficult to latch. Taking a few minutes to inspect the door, frame, and threshold before buying materials can prevent a frustrating redo.
Know When Door Weatherstripping Needs Replacement
Weatherstripping works hard in Central Florida. Heat, humidity, heavy rain, and daily use can flatten foam, dry out vinyl, loosen adhesive, and warp lightweight door sweeps. Check the perimeter of exterior doors at least once a year, especially after storm season or before months of heavy AC use.
Look for visible cracks, missing sections, compressed foam that no longer springs back, or adhesive that has pulled away from the frame. On a bright day, stand inside with the door closed and look for sunlight around the edges. You can also hold your hand near the frame on a breezy day or use a thin strip of paper. If the paper slides easily through a closed section of the door, that area likely needs a better seal.
Not every draft is caused by worn weatherstripping. A loose hinge, a sagging door, a damaged threshold, or a frame that has shifted can create gaps that new material will not solve. If the gap is noticeably wider at the top or bottom, or the door must be lifted to latch, address alignment first. Otherwise, the new seal may bind, tear, or fail early.
Choose the Right Type of Weatherstripping
Most exterior doors need sealing on the top and both sides of the frame, plus a sweep or bottom seal at the threshold. The existing material often tells you what style was originally used, but it is still worth measuring the gap before replacing it.
Common options include:
- Adhesive-backed foam tape is inexpensive and easy to install. It works best for small, consistent gaps but may compress quickly on frequently used doors.
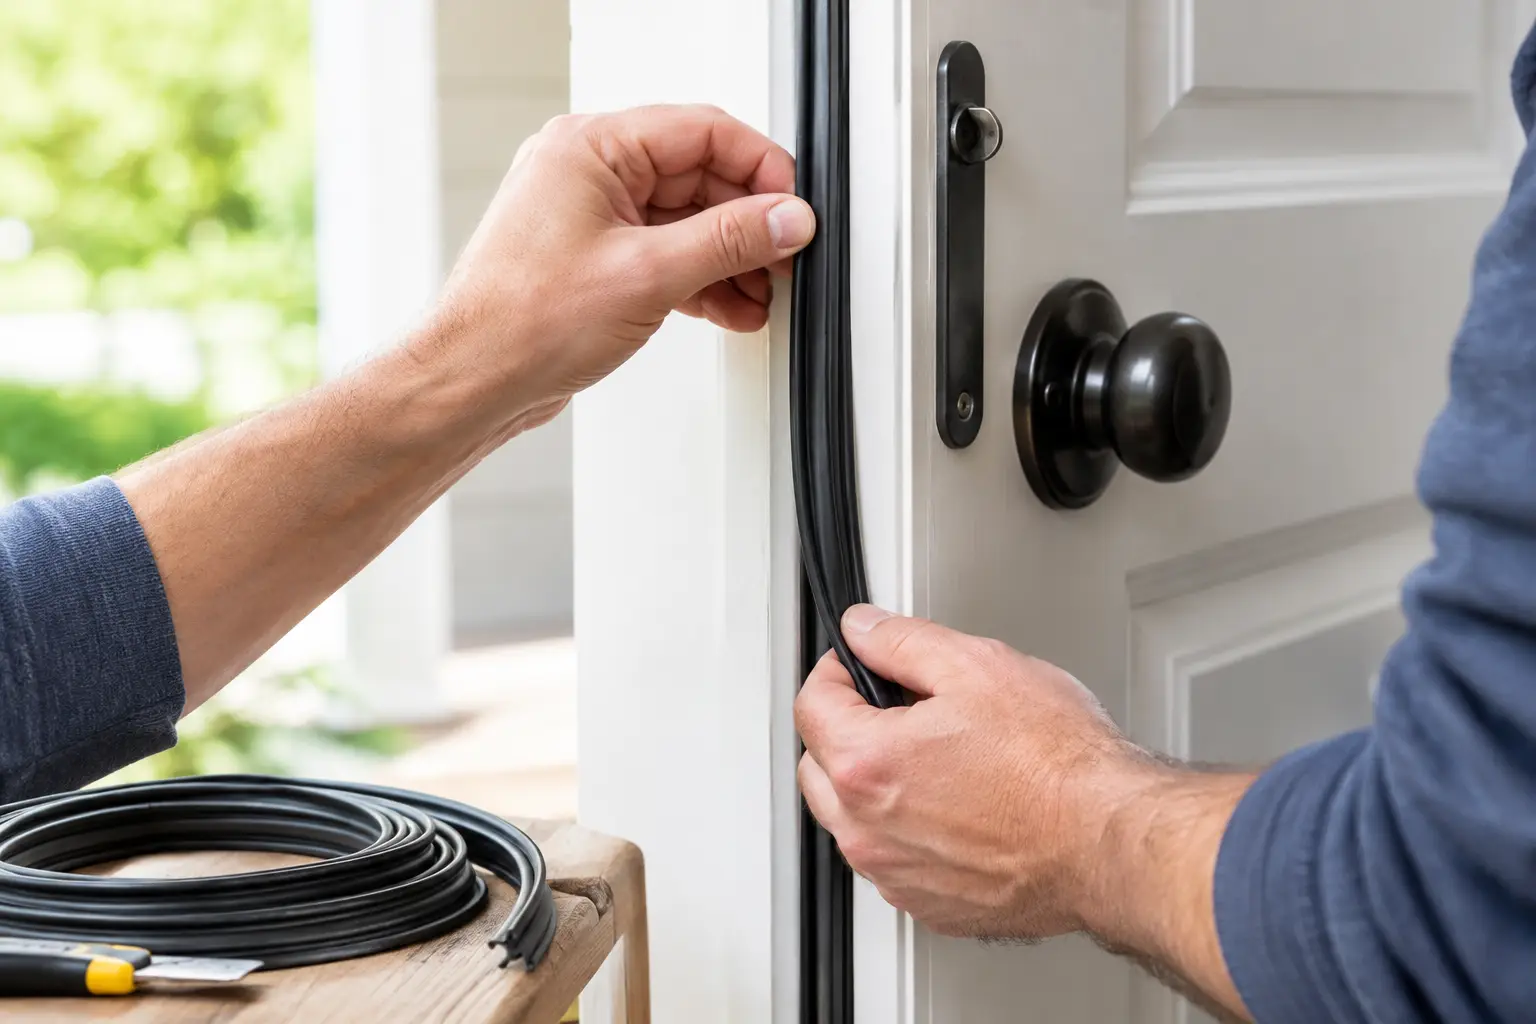
- Vinyl or rubber bulb seals offer a longer-lasting, more substantial seal. Many fit into a kerf, which is a narrow groove already cut into the door frame.
- V-strip weatherstripping is a flexible folded strip that seals narrow gaps along the sides or top of a door.
- Door sweeps and bottom seals attach to the bottom of the door or replace an existing sweep, blocking air, water, pests, and debris at the threshold.
For a main entry door, garage-to-house door, or frequently used patio access door, quality vinyl or rubber is usually worth the added cost. Foam can be a practical choice for a low-traffic utility door or a temporary fix, but it may not hold up as well to Florida heat and humidity.
Before shopping, measure the width of the door, the height of both side jambs, and the thickness or width of the existing seal. Take a small piece of the old weatherstripping with you if possible. This is particularly helpful with kerf-in seals because the mounting spine must fit the groove correctly.
How to Replace Door Weatherstripping Step by Step
Start on a dry day when the door and frame are clean. If rain has recently blown against the entry, allow the area to dry fully before applying adhesive-backed material.
1. Remove the old material carefully
Open the door and pull out loose foam, vinyl, or rubber weatherstripping. Kerf-in material usually pulls free from its groove by hand, though a flat screwdriver can help lift one end. Take care not to gouge painted wood, dent metal trim, or damage the groove in the frame.
For adhesive-backed strips, remove as much residue as possible. A plastic scraper and a household adhesive remover can help, but always test the cleaner in a hidden area first. Harsh solvents may damage paint, vinyl, or finished wood.
2. Clean and inspect the frame
Wipe down the door jamb with mild cleaner and let it dry. Adhesive will not bond reliably to dusty, oily, damp, or peeling surfaces. This is also the right time to look for loose screws, cracked caulk, rotted wood, or signs that water has been getting behind the trim.
A seal can hide a larger issue for a while, but it cannot repair it. If you find soft wood, persistent water staining, or a threshold that has separated from the floor, arrange for repairs before installing the new weatherstripping.
3. Measure each section separately
Do not assume both sides of the frame are exactly the same length. Measure the header across the top and each vertical side individually. Cut weatherstripping slightly long when possible, then trim it carefully for a clean fit.
For kerf-in weatherstripping, begin at one upper corner and press the mounting spine firmly into the groove. Work down the side without stretching the material. Stretching can cause it to shrink back later and leave a gap. Install the top piece last, trimming the ends so they meet neatly at the corners.
For adhesive-backed strips, dry-fit each piece before removing the backing. Peel only a few inches of backing at a time, press the strip into place, and continue slowly. Keep the material straight and positioned where the closed door will lightly compress it. If it is mounted too far inward, the door may not contact it. Too far outward, and the door can become difficult to close.
4. Install or replace the door sweep
The bottom of the door deserves just as much attention as the sides. Measure the door width and cut the new sweep to fit. Many sweeps attach with screws, while others slide into a channel on the bottom edge of the door.
Position a screw-mounted sweep so its flexible edge touches the threshold when the door is closed, without dragging excessively when the door opens. Pre-drilling small pilot holes is a smart move for wood doors and can help prevent splitting. For metal doors, use the fasteners recommended for the sweep.
If the threshold is cracked, uneven, or badly worn, a new sweep may still leave a draft. Adjustable thresholds can sometimes be raised slightly, while damaged units may need replacement for a reliable seal.
5. Test the door before calling the job finished
Close and latch the door several times. It should close firmly but without slamming, forcing the handle, or pulling hard on the door. Check each edge for daylight and repeat the paper test around the frame.
If the door is difficult to latch, the weatherstripping may be too thick or positioned too aggressively. Reposition it before it takes a permanent set. If one area remains open, confirm that the door is level and that the frame has not shifted before adding more material.
Avoid Common Installation Mistakes
The most common mistake is applying weatherstripping over a dirty or damp frame. It may appear secure at first, then peel away during the next humid week. Another frequent problem is using one style of seal for every gap. A narrow, uneven gap may need V-strip, while a larger gap may need a bulb seal or a frame adjustment.
Avoid sealing an interior door that needs airflow for proper HVAC operation unless a qualified professional recommends it. Also, never block required ventilation openings or the weep holes on exterior doors and windows. Those openings help manage moisture and should remain clear.
For rental homes and commercial properties, document recurring drafts or water entry rather than replacing seals repeatedly. Repeated failure can point to a door closer problem, worn hinges, improper installation, or building movement. Correcting the cause is more cost-effective than treating the same symptom every few months.
When to Call a Handyman
Replacing a simple strip of foam is often a reasonable DIY task. It becomes more involved when the door sticks, the frame is damaged, the threshold leaks, or a security door and main door both need to be adjusted. Exterior door repairs also require care because poor sealing can lead to moisture damage around trim, flooring, and wall surfaces.
Davenport Handyman Services can inspect the full door assembly, identify whether the issue is the seal, the sweep, the threshold, or the door alignment, and complete the repair with quality materials. A professional inspection is especially useful for landlords and property managers who need dependable results across multiple units.
A properly sealed door should feel simple when you use it: it closes securely, keeps conditioned air where it belongs, and stands up to changing weather without a struggle. If your door still lets in air or water after a careful replacement, treat that as a useful signal that the surrounding components need attention too.