
How to Clean Dryer Vents Safely at Home
A load that suddenly takes two or three cycles to dry is more than a laundry-room annoyance. It can be an early warning that lint is restricting airflow. Knowing how to clean dryer vents helps protect your home, reduce strain on the dryer, and avoid the higher energy bills and fire risks that can come with neglected maintenance.
For homeowners, landlords, and property managers in Central Florida, dryer vent care is a practical part of keeping a property safe and operating well. The job is manageable in many homes, but the right approach depends on the dryer type, the length and route of the vent, and whether you find signs of damage or a serious blockage.
Why a clean dryer vent matters
Every time a dryer runs, it pulls hot, moist air and lint through the duct behind the appliance and out through an exterior vent hood. The lint screen catches a lot of debris, but not all of it. Fine lint can build up inside the transition hose, rigid ductwork, elbows, and exterior termination cap.
When airflow becomes restricted, moisture stays in the dryer longer. Clothes take longer to dry, the appliance runs hotter, and the motor and heating components work harder than they should. Lint is also combustible, which is why a blocked dryer vent deserves more attention than a simple cleaning chore.
Florida homes have an additional consideration: humidity. Damp air can make drying feel less efficient, and exterior vent hoods may collect pollen, landscaping debris, insect nests, or lint that mats together after wet weather. Regular inspection keeps a small buildup from becoming a larger repair issue.
Signs your dryer vent needs cleaning
Do not wait for the vent to become completely blocked. A dryer often gives clear clues that it needs attention. If clothes are still damp after a normal cycle, the outside of the dryer feels unusually hot, or the laundry room becomes hotter and more humid while the machine is running, check the vent system.
A musty smell on clothes can also point to poor moisture removal. Outside, weak or absent airflow at the vent hood during a drying cycle is another warning sign. You may see lint around the exterior flap, but a clean-looking flap does not guarantee that the duct behind it is clear.
Turn off the dryer and arrange prompt service if you notice a burning smell, scorching around the dryer connection, repeated overheating, or a vent hose that is crushed, torn, or made from thin flexible plastic. Those conditions can create a safety concern that goes beyond routine cleaning.
What you need before you start
For a straightforward cleaning, gather a vacuum with a hose attachment, a dryer vent brush kit with flexible rods, a microfiber cloth, a screwdriver if your vent connection uses a clamp, and gloves. A flashlight helps you inspect the wall opening and the exterior hood.
Use a purpose-made dryer vent brush rather than forcing household tools into the duct. Sharp or improvised tools can puncture flexible ducting, disconnect joints, or push lint farther into a bend. If your vent run is long, travels through an attic or wall cavity, or has several turns, a professional rotary cleaning system is usually the safer choice.
Before moving the dryer, clear a path and protect nearby flooring from scratches. Dryers are heavier than they look, and pulling one too far can damage the power cord, gas connector, water line on a steam dryer, or the vent connection.
How to clean dryer vents step by step
Start by turning the dryer off and unplugging it. If you have a gas dryer, close the gas shutoff valve before moving the appliance. Do not disconnect the gas line unless you are qualified to do so. A licensed professional should handle any suspected gas leak, damaged connector, or appliance reconnection concern.
Pull the dryer away from the wall carefully, just far enough to reach the vent connection. Remove the transition duct from the back of the dryer and from the wall connection if accessible. Take a moment to inspect it. A short, properly supported metal transition duct is the preferred setup. Thin foil or white vinyl hoses can sag, tear, and trap lint, so replacement with the appropriate metal duct may be worthwhile.
Vacuum loose lint from the dryer exhaust opening, the transition duct, and the wall connection. Clean the lint screen as well. If it has a film from dryer sheets or fabric softener, wash it gently with warm water and mild dish soap, then let it dry completely before reinstalling it. A coated lint screen can reduce airflow even when it looks clean.
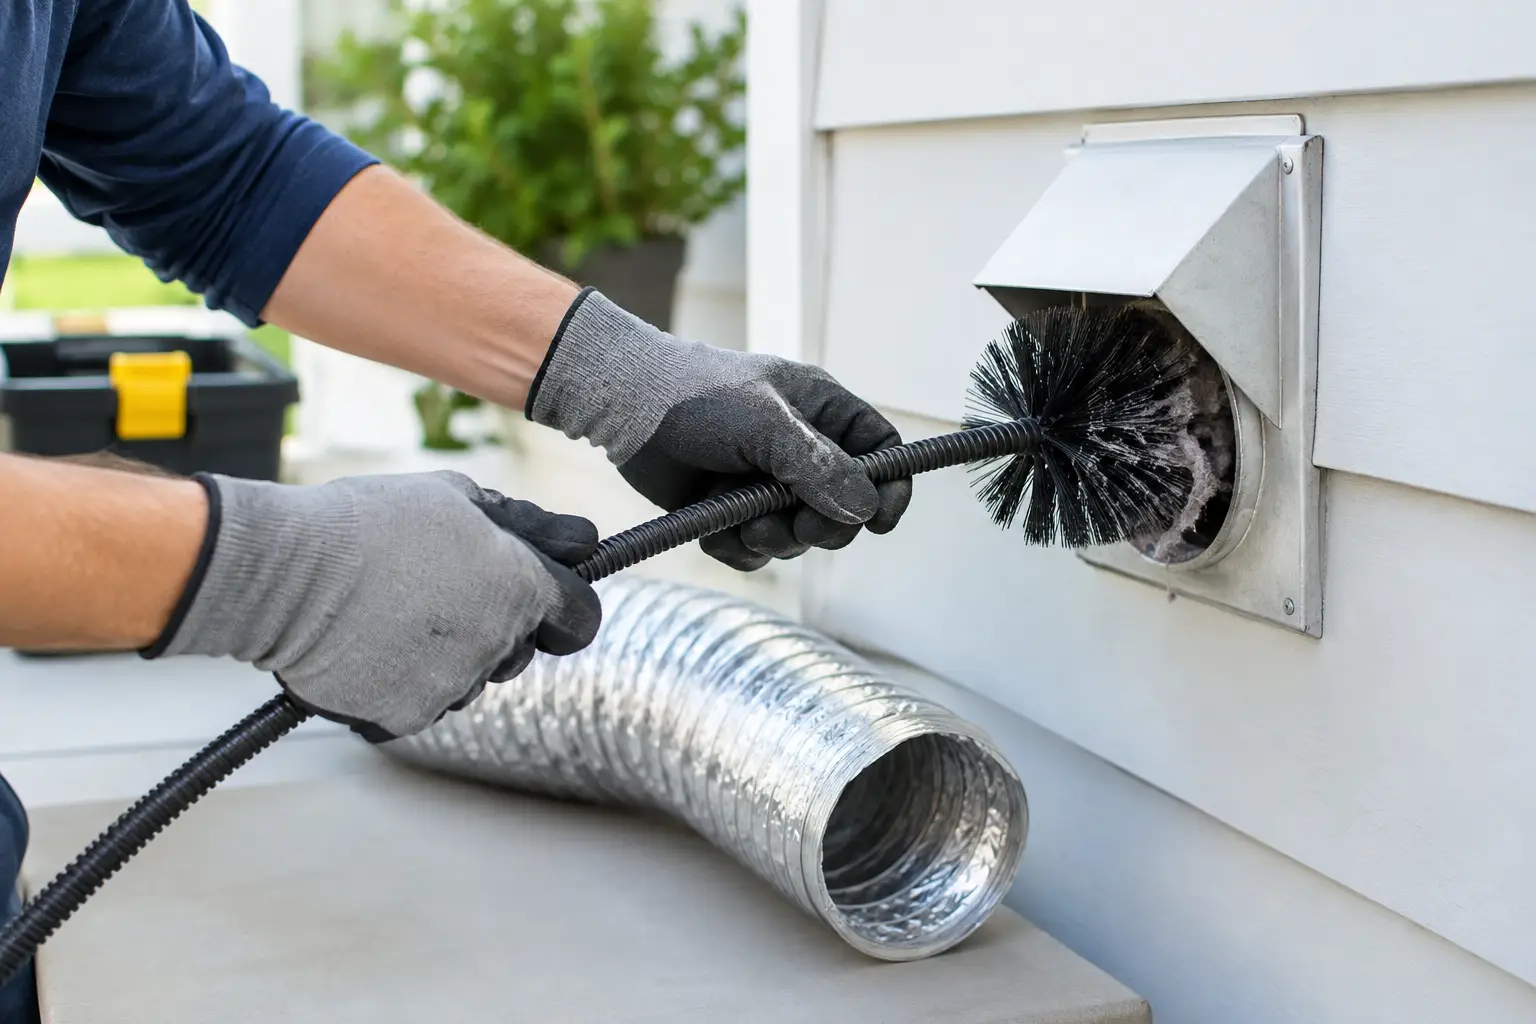
Next, feed the vent brush into the wall duct a short distance at a time. Rotate it gently as you push and pull it back. Do not force the brush through resistance. The goal is to loosen lint so it can be removed, not to ram debris deeper into the line or damage a joint.
Vacuum at the wall opening as you work. Depending on your duct layout, you may need to approach from both the laundry room and the exterior vent hood. Keep track of the brush rods and tighten their connections securely. A rod that separates inside a long duct can turn a simple project into a service call.
Go outside and inspect the vent hood. Remove visible lint, leaves, and debris from the flap or louvers. The flap should open freely when the dryer is operating and close when it is off. Do not cover the exterior hood with a screen, even if insects are a concern. Screens can catch lint quickly and restrict exhaust airflow.
Reconnect the duct, making sure it is not crushed behind the dryer. Use clamps or approved foil tape at joints if needed. Standard cloth duct tape is not a reliable choice because heat and humidity can cause it to fail. Push the dryer back slowly, leaving the duct as straight and uncompressed as possible.
Finally, restore power and run the dryer on an air-only or short cycle. Go outside to confirm that air is moving strongly through the exterior hood. Check indoors for vibration, loose connections, or escaping air around the duct. If airflow is still weak, stop using the dryer until the restriction is found.
How often should you clean a dryer vent?
Most households should clean the dryer vent at least once a year. That schedule can change based on use. A large family, shared rental, vacation property with frequent turnover, pet owners, or anyone who does several loads each week may need cleaning every six months.
Commercial laundry areas and multifamily properties need a more deliberate maintenance plan because the equipment runs more often and a single blocked vent can affect tenants, operating costs, and safety. Keep a simple service record showing the date of inspection, cleaning, repairs, and any duct upgrades. It makes ongoing property care easier to manage.
Cleaning the lint screen before every load is still essential, but it is not a substitute for cleaning the entire vent path. The screen protects the system. It does not eliminate lint buildup farther down the line.
When a DIY cleaning is not enough
A homeowner can often clean a short, straight vent run successfully. The trade-off is that you cannot always see what is happening inside concealed ductwork. Long vents, roof exits, multiple 90-degree turns, disconnected sections, and signs of birds or pests call for a more thorough inspection.
Professional help is also smart when the dryer continues to take too long after cleaning. The problem may be a crushed duct, an improperly installed vent hood, moisture damage, an appliance issue, or a vent route that does not meet current safety expectations. Simply cleaning the accessible ends will not solve those problems.
Davenport Handyman Services can help property owners assess dryer vent conditions as part of practical home maintenance and repair planning. A careful inspection identifies whether the system needs cleaning, repair, rerouting, or a safer duct connection before a small issue becomes an expensive interruption.
Keep the vent clear between cleanings
Good habits make dryer vent maintenance simpler. Avoid overloading the dryer, because dense loads shed more lint and dry unevenly. Leave enough space behind the appliance so the vent hose is not pinched. After storms, yard work, or pressure washing around the exterior of the home, take a quick look at the outdoor hood to ensure it can open properly.
If you are renovating a laundry room, do not treat the dryer vent as an afterthought. New cabinets, shelving, or a relocated appliance can crowd the duct and create sharp bends. Planning the space around a clean, direct exhaust route supports safer operation and better drying performance.
A dryer should make laundry easier, not leave you guessing why towels are still damp after an hour. A few minutes of regular attention, plus a professional inspection when the system is hard to access or shows warning signs, can keep the air moving and your property better protected.