How to Stop Toilet Running and Cut Water Waste
A toilet that refills for a few seconds after flushing is normal. A toilet that hisses, trickles, or cycles back on long after the flush is wasting water – and often raising your utility bill without you noticing. Knowing how to stop toilet running starts with identifying which part inside the tank is allowing water to escape.
The good news is that many running-toilet repairs are straightforward. The less-good news is that a small issue, such as a worn flapper, can waste a surprising amount of water over days or weeks. Start with a careful inspection, make one adjustment at a time, and do not force aging plastic parts that may crack.
Why a Toilet Keeps Running
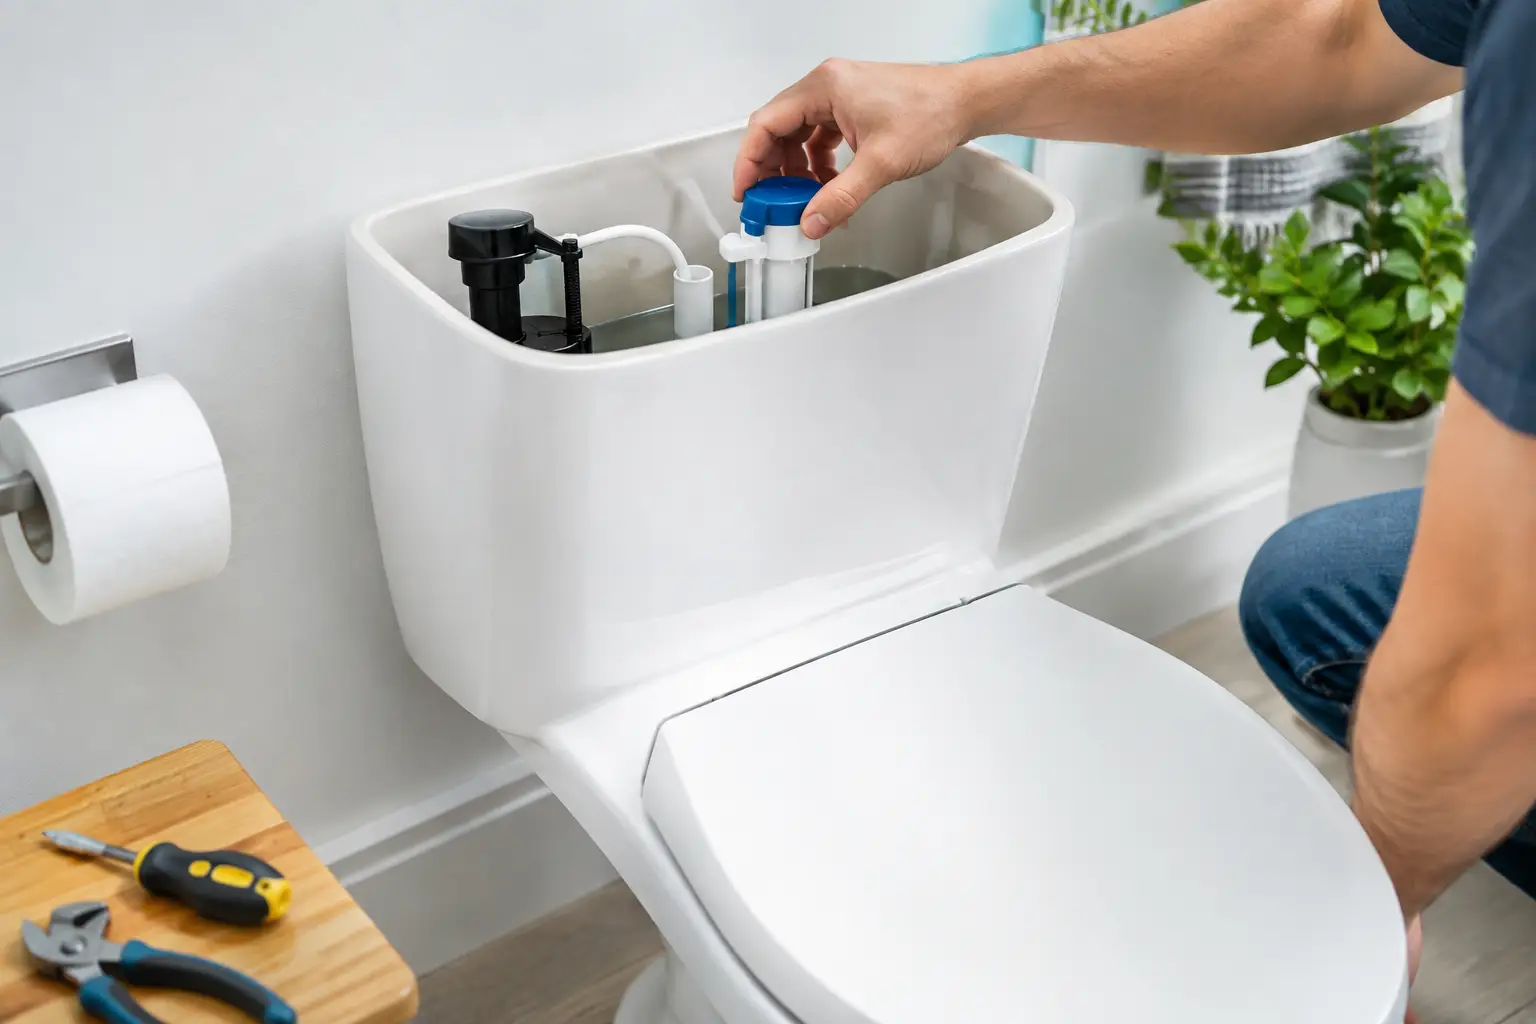
Your toilet tank holds clean water until you flush. The flush lifts a rubber flapper or seal at the bottom of the tank, releasing water into the bowl. Once the tank empties, the flapper should close and the fill valve should refill the tank to a set level, then shut off completely.
A running toilet means one of those steps is not finishing correctly. Water may be leaking slowly from the tank into the bowl, or the tank may be filling beyond its proper level and sending water down the overflow tube. In either case, the fill valve keeps trying to replace lost water.
Before working inside the tank, remove the lid carefully and place it on a towel or stable surface. Porcelain lids can crack easily, and replacement lids are not always easy to match.
How to Stop Toilet Running: Find the Source First
With the tank lid off, listen and watch while the toilet is running. The water level and the movement of the parts will usually point to the cause.
Check the flapper for a slow leak
The flapper is the flexible rubber piece that covers the drain opening at the bottom of most toilet tanks. It should sit flat and create a watertight seal after each flush. Over time, chlorine, hard-water buildup, and ordinary wear can cause it to become warped, stiff, or coated with mineral residue.
If the tank is full but the fill valve periodically turns on by itself, the flapper is the most likely culprit. A simple dye test can confirm it. Add a few drops of food coloring to the tank water, wait about 15 minutes without flushing, and check the bowl. Color in the bowl means tank water is slipping past the flapper.
First, make sure the flapper chain is not too short. A tight chain can hold the flapper slightly open. It should have a little slack when the flapper is closed, while still being short enough to lift the flapper fully when you press the handle.
If the chain is adjusted correctly, turn off the water supply valve behind or beside the toilet, flush to empty most of the tank, and inspect the flapper. Wipe away any debris around the valve seat. If the rubber looks damaged or no longer lies flat, replacing the flapper is usually the best solution. Take the old part or a clear photo with you when buying a replacement, since toilets use different sizes and connection styles.
Look at the overflow tube
The overflow tube is the open vertical tube near the center of the tank. Its job is to direct excess water safely into the bowl if the fill valve fails to shut off. If water is constantly flowing into this tube, the tank water level is too high.
The correct water level is normally marked inside the tank and should sit about an inch below the top of the overflow tube. If the level is higher, adjust the fill valve’s float. Some valves use a screw adjustment, while others have a sliding clip or a float cup that can be moved up or down. Lower the float slightly, flush, and let the tank refill before checking the new level.
Avoid setting the water level too low. A toilet may then have a weak flush, which can lead to clogs and repeat flushing. The goal is a proper fill level, not the lowest possible amount of water.
Inspect the fill valve
The fill valve is the tall assembly that controls water entering the tank. It is often the source of a steady hissing sound, inconsistent shutoff, or a tank that takes far too long to fill. Sediment and mineral deposits can interfere with the valve’s internal seal, particularly in older fixtures.
Make sure the refill tube is clipped to the top of the overflow tube. It should not be pushed down inside the tube. If it sits too far down, it can create a siphoning effect that continually pulls water from the tank and makes the fill valve run.
If the refill tube is positioned correctly and the float adjustment does not stop the water, the fill valve may need cleaning or replacement. Replacement fill valves are generally affordable, but installation involves shutting off the supply, disconnecting the water line, and setting the new valve height correctly. If the shutoff valve is corroded, difficult to turn, or begins dripping, stop and arrange a professional repair rather than creating a larger leak.
Do Not Overlook the Flush Handle and Chain
Sometimes the problem is visible before you even remove the tank lid. A toilet handle that stays down after flushing can keep tension on the chain and prevent the flapper from sealing. Lift the handle gently. If the running stops, the handle assembly may be sticking or the chain may be caught.
Inside the tank, check whether the chain is tangled around the flush lever or caught beneath the flapper. The chain should run freely in a direct line. If it has excessive length, use the proper chain clip to secure the extra links rather than leaving them where they can snag.
A corroded flush lever can also bind. Replacing it is usually simple, but remember that many toilet handle mounting nuts have reverse threads. Turning the nut the wrong way can damage the part or make removal unnecessarily difficult.
When a Running Toilet Needs Professional Help
A flapper or minor float adjustment is often a reasonable homeowner repair. It depends, however, on the condition of the toilet and the plumbing around it. Call for service when the problem continues after replacing the obvious worn part, when the tank has cracks, or when the supply line, shutoff valve, or toilet base leaks.
You should also have the toilet inspected if you notice water on the floor, a soft or discolored area around the base, sewer odors, or a toilet that rocks when you sit on it. Those issues can point to a failing wax ring, loose mounting hardware, or damaged flooring – none of which will be fixed by adjusting a fill valve.
For landlords and property managers, a running toilet deserves prompt attention even when it seems minor. It can increase water use, frustrate tenants, and eventually expose weaknesses in an older fixture. A professional inspection can determine whether a targeted repair makes sense or whether an aging toilet is better replaced with a water-efficient model.
Davenport Handyman Services can help property owners with practical plumbing repairs, fixture adjustments, and broader maintenance needs, using a careful inspection and a clear plan before work begins.
A Few Habits That Help Prevent Repeat Problems
Do not use drop-in bleach tablets inside the tank unless the toilet manufacturer specifically approves them. These products can shorten the life of rubber seals, flappers, and valve components. If you want to clean the bowl, use a bowl cleaner as directed rather than treating the tank water.
It also helps to check inside each toilet tank a few times a year. Look for mineral buildup, rusted hardware, a loose refill tube, or water levels that sit too high. In Central Florida homes, routine checks can be especially useful where water conditions and frequent household use gradually wear down small internal parts.
A quiet bathroom should stay quiet after the tank refills. If you hear water running again later, address it while the repair is still small. A properly adjusted toilet saves water, protects your property budget, and lets one of the most-used fixtures in your home do its job without demanding attention.