Why Paint Bubbles on Walls and How to Fix Them
A smooth new paint job can look great in the morning and develop raised blisters by afternoon, especially in Central Florida heat and humidity. If you are wondering why paint bubbles on walls, ceilings, trim, or exterior siding, the paint is usually reacting to a problem beneath it. The bubble itself is only the visible symptom. Moisture, poor surface preparation, excessive heat, or an incompatible coating can all break the bond between paint and the surface.
The right repair depends on the cause. Scraping and repainting may improve the appearance for a short time, but bubbles often return if a leak, humidity issue, or failing previous paint layer is left unaddressed.
Why Paint Bubbles Form
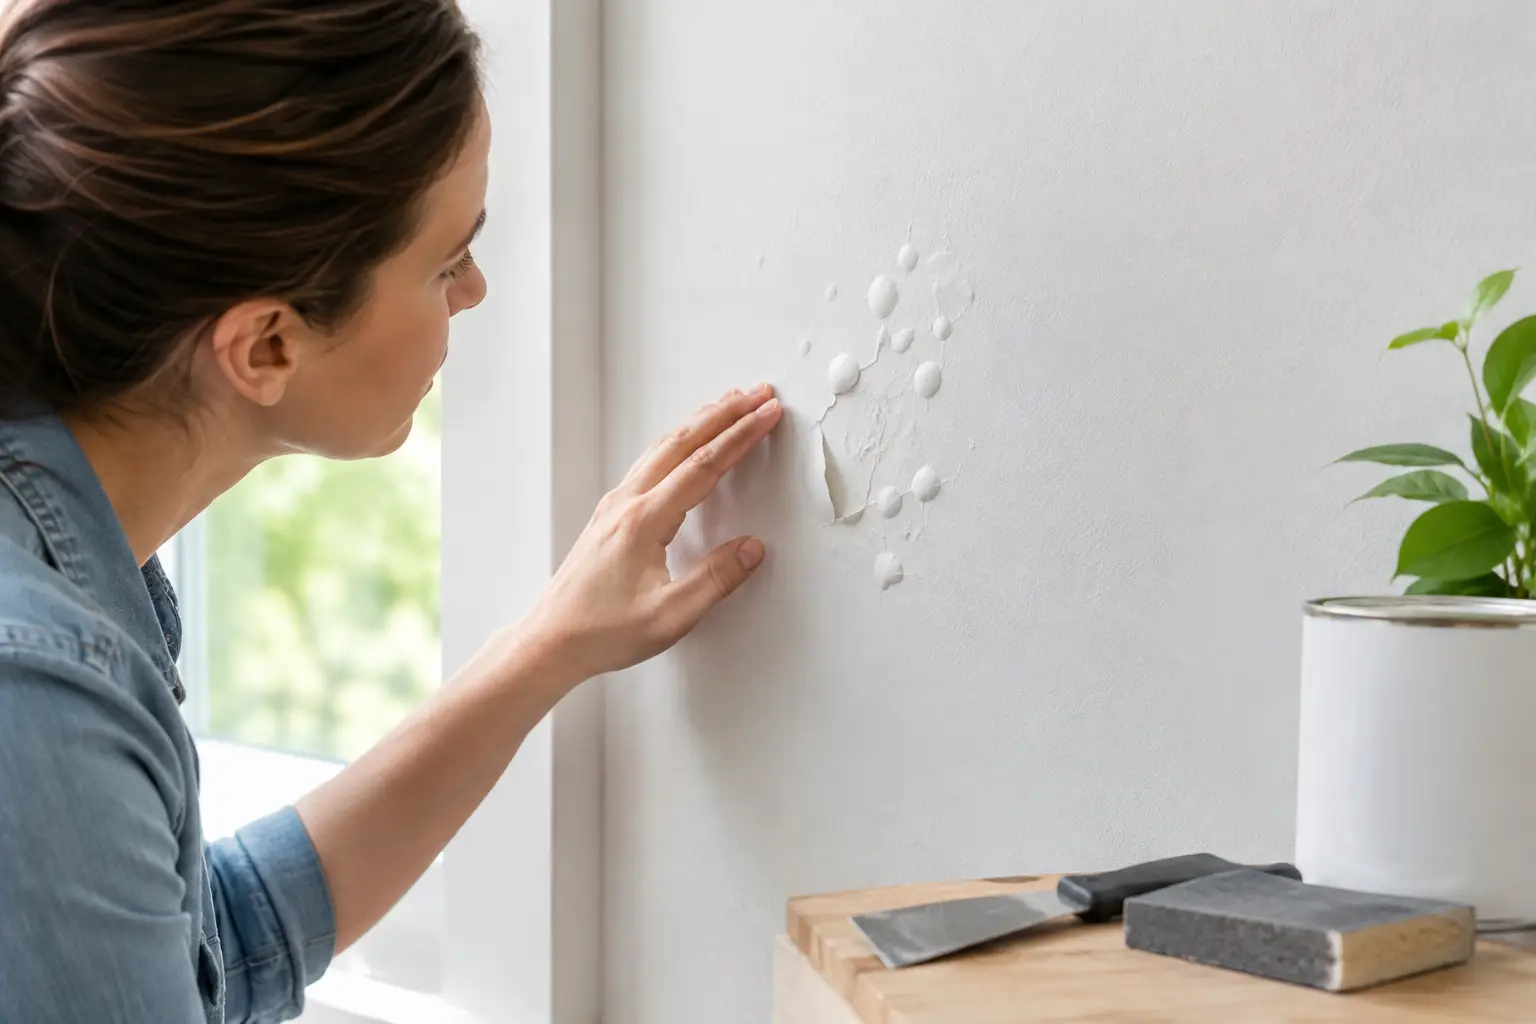
Paint bubbles, also called blistering, happen when paint loses adhesion and lifts away from the material below. Air, water vapor, or liquid moisture becomes trapped under the coating and pushes it outward. In some cases, paint was applied over a surface that was too hot, wet, dirty, or glossy for the new coat to grip properly.
A few small bubbles in one location may point to a localized issue. Widespread bubbling across a room, exterior wall, or ceiling usually calls for a closer inspection before any repainting begins.
Moisture behind the paint
Moisture is one of the most common reasons paint bubbles indoors. A slow plumbing leak behind a wall, a roof leak above a ceiling, failed caulking around a window, or condensation from an AC system can allow water into drywall, wood, or masonry. As that moisture tries to evaporate, it pushes against the paint film and creates blisters.
Bathrooms, laundry rooms, kitchens, garages, and rooms near air-conditioning equipment are frequent trouble spots. In Davenport and throughout Central Florida, high outdoor humidity can also contribute when indoor ventilation is limited.
Look for other warning signs around the bubbles: yellow or brown stains, soft drywall, a musty odor, peeling tape at drywall seams, or recurring bubbles after repainting. These clues suggest that painting should wait until the source of moisture is corrected.
Painting over a damp surface
A wall does not need an active leak to be too damp for paint. Fresh drywall compound, pressure-washed exterior surfaces, recently cleaned walls, and wood exposed to rain may hold moisture longer than expected. When paint is applied before the surface dries fully, moisture becomes sealed in and can later lift the coating.
Drying time depends on the material, weather, airflow, and humidity. A surface that feels dry to the touch is not always dry enough for paint. Exterior work after a humid morning, a rainstorm, or heavy pressure washing deserves extra patience.
Heat and direct sun
Exterior paint can blister when applied to siding, trim, doors, or masonry that is extremely hot from direct sun. The top layer of paint may dry too quickly while solvents or moisture below try to escape. Dark-painted surfaces and south- or west-facing walls are particularly vulnerable during hot Florida afternoons.
Heat can also affect interior projects. Painting a wall near a hot window, running heater, or poorly ventilated garage can cause uneven drying. The goal is not simply warm weather – it is a stable surface temperature and enough time for each coat to cure properly.
Poor cleaning or surface preparation
Paint needs a clean, sound surface. Dust, grease, smoke residue, mildew, chalky exterior paint, soap film, and sanding debris can all keep a new coat from bonding. This is especially common on kitchen walls, bathroom ceilings, garage doors, and exterior trim.
Glossy paint can create a similar problem. If a slick, previously painted surface is not properly cleaned, lightly sanded, or primed when needed, the new paint may sit on top rather than attach securely. Over time, it can separate in bubbles or sheets.
Applying paint too heavily or too soon
A thick paint coat may look efficient, but it can trap moisture and solvents beneath the surface. The same issue can occur when a second coat is applied before the first coat has dried according to the product directions. The outer skin dries first, while the material underneath remains soft and tries to release vapor.
This does not mean every paint project needs long delays between coats. It means the right timing matters. Humid conditions often extend drying times, even when the label gives a shorter estimate for ideal conditions.
Incompatible paint layers
Not all paint products work well together. For example, applying a new coating over old peeling paint without proper preparation can lead to failure. Using the wrong primer on bare wood, stained drywall, masonry, metal, or patched areas can also cause adhesion issues.
The condition of the old paint matters as much as the type of new paint. If the existing layer is already weak, any fresh paint attached to it can fail right along with it.
How to Fix Paint Bubbles Without Repeating the Problem
Do not paint over bubbles. The new coat may hide them briefly, but it will not restore the bond underneath. Start by determining whether the area is dry and structurally sound.
If the bubble is small and there are no signs of moisture, carefully scrape away loose paint with a putty knife. Continue until you reach paint that is firmly attached. Sand the edges so the repair blends smoothly with the surrounding wall, remove all dust, and apply the appropriate primer before repainting.
For a shallow drywall repair, use joint compound to level the scraped area after it has dried. Once the patch is sanded smooth, prime it before applying finish paint. Primer helps the repaired spot absorb paint evenly and reduces the chance of flashing, where the patch looks different from the rest of the wall.
If bubbles contain water, the drywall feels soft, or stains are visible, stop before scraping a large area. Find and repair the moisture source first. That may involve plumbing, roof, window, exterior caulking, AC drainage, or ventilation work. Damaged drywall or wood may need replacement if it has swelled, weakened, or developed mold.
For exterior bubbling, remove all loose coating, allow the material to dry thoroughly, and address failed caulk, gaps, rot, or drainage problems. Bare areas should receive a primer designed for the surface before exterior paint is applied. A quality repaint is only as durable as the preparation beneath it.
How to Prevent Paint Bubbles on Your Next Project
Good painting begins before the can is opened. Clean walls with an appropriate cleaner, remove mildew safely, and rinse away residue. Repair cracks, leaks, loose caulk, and damaged surfaces before applying primer or paint.
Pay close attention to weather and room conditions. Avoid exterior painting during rain, immediately after rain, or on surfaces baking in direct sunlight. Indoors, use ventilation in humid rooms and make sure bathroom exhaust fans are doing their job. Running the air conditioner can help manage humidity, but a persistent moisture problem still needs a real repair.
Use the correct primer for the job, especially on new drywall, bare wood, stained areas, masonry, metal, and glossy surfaces. Apply paint in thin, even coats and allow the recommended drying time between coats. Premium materials help, but careful preparation is what gives them a fair chance to perform.
When Bubbling Paint Needs Professional Attention
A few bubbles on a dry wall can often be repaired with basic prep and touch-up painting. Repeated bubbling, ceiling blisters, bubbling near windows or plumbing fixtures, or paint failure across a large area deserves a professional inspection. The repair may involve more than painting, and finding the underlying issue early can prevent larger water damage and unnecessary repainting costs.
Davenport Handyman Services can inspect the affected area, identify practical repair options, and handle the surface preparation and painting needed for a polished finish. Whether the issue is a small wall repair or a broader moisture-related concern, quality workmanship starts with fixing what caused the paint to fail in the first place.
A paint bubble is your property’s way of asking for a closer look. Address the condition behind it, give the surface the preparation it needs, and the next coat of paint can do what it is meant to do: protect and beautify your space.